JVC GR DV 3 Manuel d'utilisateur
Naviguer en ligne ou télécharger Manuel d'utilisateur pour Caméscopes JVC GR DV 3. JVC GR DV 3 User's Manual Manuel d'utilisatio
- Page / 88
- Table des matières
- DEPANNAGE
- MARQUE LIVRES
- INSTRUCTIONS 1
- SAFETY PRECAUTIONS 2
- SOME DO’S AND 3
- DON’TS ON THE SAFE 3
- USE OF EQUIPMENT 3
- ABOUT DV 5
- PROVIDED ACCESSORIES 6
- Installing The Battery Pack 9
- GETTING STARTED 10
- Date/Time Settings 11
- Recording Mode Setting 13
- Dioptre Adjustment 15
- Tripod Mounting 15
- Operation Mode 17
- RECORDING 18
- Tape Remaining Indicator 19
- Brightness Control 19
- Viewfinder Indications 19
- TC 12 : 34 : 24 21
- Self-Timer 25
- Motor Drive mode: 27
- REC MODE (Recording mode) 29
- WIDE MODE 29
- System Menu 31
- Advanced Features (Cont.) 32
- FADE/WIPE Effects 33
- IMPORTANT: 33
- Picture Wipe/Dissolve 35
- FADER AND WIPE MENU 37
- P.AE/Effects 39
- Manual Focus Adjustment 41
- Iris Lock 43
- Z pg. 44), select “ MAN.” 45
- PLAYBACK 46
- Still Playback 47
- Slow-Motion Playback 47
- Playback Effects 49
- Z pg. 50) 51
- INFORMATION: 53
- ( ) 55
- Digital Dubbing 59
- Brand Setting 60
- (Cont.) 60
- Random Assemble Editing 61
- Z pg. 62) 63
- For More Accurate Editing 64
- Z pg. 64) 65
- Audio Dubbing 66
- TROUBLESHOOTING 68
- AFTER USE 73
- Camcorder 74
- AC Charger Station 76
- Indications During Recording 77
- Indications During Playback 78
- REFER MANUAL 79
- CAUTIONS 80
- Main Unit 81
- SPECIFICATIONS 82
- GLOSSARY OF TERMS 84
Résumé du contenu
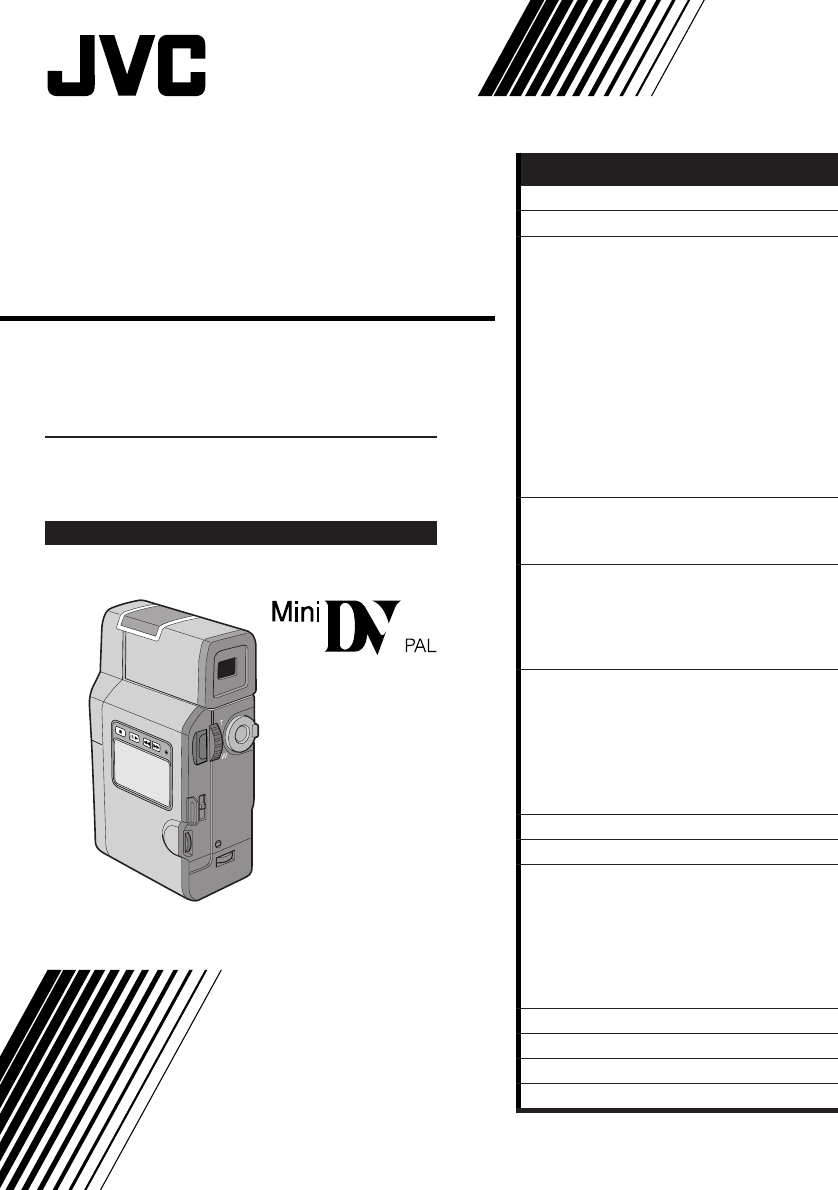
GR-DV3DIGITAL VIDEO CAMERALYT0193-001BINSTRUCTIONSCONTENTSPlease visit our CyberCam Homepage onthe World Wide Web and answer ourConsumer Survey (in En
10 EN1INSERT CHARGED BATTERYTo insert a battery pack, slide the battery lockswitch to the release position and insert thebattery end first. To preven
EN 11Date/Time SettingsDate and time will automatically be recorded on tape at all times. It is your choice to display it or not duringplayback (Z pg.
12 ENGETTING STARTED (Cont.)Loading/Unloading A CassetteThe camcorder needs to be powered up to load or eject a cassette.1OPEN CASSETTE COVERTurn the
EN 13Recording Mode SettingSet depending on your preference.OFFPLAYAM5SSP SPLPREC MODEWIDE MODE OFFAGC40XSPZOOMDISGAIN UPTO DATE / TIME MENUTO SYSTEM
14 ENGETTING STARTED (Cont.)Grip Strap Attachment1ATTACH GRIP STRAP TO HANDSTRAP EYELETOpen the pad and pull the grip strap in thedirection of the ar
EN 15Dioptre AdjustmentAdjust the viewfinder display for best viewing.1SELECT OPERATION MODESet the Power Dial to “A” or “M”.2TURN ON CAMCORDERPull ou
16 ENTWRemote Control UnitYou can use the RM-V712U to control the camcorder. When using the remote control, be sure to point it atthe remote sensor. T
EN 17Power Dial Position FunctionAllows you to record using NO special effects or manual adjustments.Suitable for standard recording.Allows you to set
18 ENYou should already have performed the necessary preparations (Z pg. 8 – 17). Set the Power Dial to “A”and try recording that way before attemptin
EN 19NOTES:●Be careful not to cover the camera sensor; built-inhere is the sensor necessary for shooting.●If 5 minutes elapse in the Record-Standby mo
2 ENConnection to the mains supply in the UnitedKingdom.DO NOT cut off the mains plug from this equipment.If the plug fitted is not suitable for the p
20 EN1SELECT OPERATION MODETurn the Power Dial to “PLAY” while pressingdown the lock button located on the dial.•The power lamp comes on.2PULL OUT VIE
EN 21Time CodeDuring recording, a time code is recorded on the tape. This code is to confirm the location of therecorded scene on the tape during play
22 ENZoomSelect any one of the three powers of magnification and get “closer” to the subject (Z pg. 30).Simply set the zoom switch to either zoom in (
EN 23Displaying The Date And Time During RecordingWhen the Power Dial is set to “M”, “5S” or “ ”, you can choose whether to display the date and timed
24 ENScene (5-second recording)Record a vacation or an important event in 5-second clips to keep the action moving. The 5-Secondfunction may also be a
EN 25Self-TimerOnce the camcorder is set, the camcorder operator can become part of the scene in a more natural wayadding the final touch to a memorab
26 ENRECORDING Advanced Features (Cont.)1SELECT OPERATION MODEFirst turn the Power Dial to “M” while pressingdown the lock button located on the dial
EN 27Motor Drive mode:Keeping the SNAPSHOT Button pressed provides aneffect similar to serial photography. (The intervalbetween the still pictures: ap
28 ENMenusThe Recording Menu allows you to set these functions:Recording Mode, Wide Mode, Zoom Magnification, Digital Image Stabilizer, Gain Up, Date/
EN 29REC MODE (Recording mode)You can change the tape recording speed. LP tape speed is slower than SP, allowing LP to record 1.5 timeslonger than SP.
EN 3This unit is produced to comply with StandardIEC Publ. 65.CAUTION (applies to the AC Charger Station):TO REDUCE THE RISK OF FIRE, DO NOTREMOVE COV
30 ENZOOM (Zoom magnification)You can select 10X, 40X, or 100X maximum zoom magnifications.10X–Optical zoom that does not degrade the quality of the r
EN 311SELECT OPERATION MODEFirst turn the Power Dial to “M” while pressingdown the lock button located on the dial,make sure the viewfinder is pulled
32 ENONOFF32kHz065SSCENEBEEP / TALLYFRAMEPHOTO MODEWIND CUTSOUND MODEID NUMBEROFFDEMO. MODERETURN432kHz 48kHz5S ANIM.ON OFFONOFFONOFF5SDFRAME MULTI 4
EN 33FADE/WIPE EffectsIMPORTANT:If certain P.AE/Effects (Z pg. 40) are activated, some Fade/Wipe Effects cannot be used. If you select a Fade/Wipe Eff
34 ENFades and WipesA scene gradually appears on a black or white screen (Fade In/Wipe In), or disappears, leaving a black orwhite screen (Fade Out/Wi
EN 35Picture Wipe/DissolveCombine the Picture Wipe and Dissolve functions for a professional transition effect. There are 6 PictureWipe effects and 1
36 ENRandom VariationsWhen R? is selected, the camcorder chooses one ofthe fades/wipes at random.1START RECORDINGPress START/STOP. The camcorder does
EN 37MENU EFFECTFade in or out with a white screen.Fade in or out with a black screen.Fade in or out with a full-screen mosaic effect.Fade in to a col
38 ENRECORDING Advanced Features (Cont.)MENU EFFECTThe new scene gradually appears as the old one graduallydisappears.The new scene wipes in over the
EN 394SELECT EFFECTMove the pointer and highlight bar to thedesired effect by rotating the Select Dial, thenpress it.•The P.AE/Effect Menu disappears
4 ENAbout BatteriesDANGER! Do not attempt to take the batteriesapart, or expose them to flame or excessive heat, asthere is a risk of fire or explosio
40 ENGives recorded scenes a strobe effect.Your recording looks like a series of consecutivesnapshots.SLOW (Slow Shutter)You can light dark subjects o
EN 41Manual Focus AdjustmentThe camcorder, in most cases, adjusts the focus from approx. 5 cm to infinity automatically. However, whenfocusing is diff
42 EN1SELECT OPERATION MODEFirst turn the Power Dial to “M” while pressingdown the lock button located on the dial,make sure the viewfinder is pulled
EN 431SELECT OPERATION MODEFirst turn the Power Dial to “M” while pressingdown the lock button located on the dial,make sure the viewfinder is pulled
44 ENWhite Balance AdjustmentA term that refers to the correctness of colour reproduction under various lighting. If the white balance iscorrect, all
EN 45To Change The Tint For Recording . . ... in step 2, substitute coloured paper for white. Thewhite balance is adjusted based on the colour,chang
46 ENYou can watch what you’ve recorded in the viewfinder.1SELECT OPERATION MODETurn the Power Dial to “PLAY” while pressingdown the lock button locat
EN 47To Perform High-Speed Search . . ... press 2 or 3 after pressing 6/4. The tapewill move at approximately 9 times the normalplayback speed. Watc
48 EN4END ZOOMPress and hold W until magnification returns tonormal. Or, press STOP and then press PLAY.NOTES:●Zoom can also be used during slow-motio
EN 491START PLAYBACKPress the Play button (4).2ACCESS PLAYBACK EFFECT SELECTMENUPoint the remote control at the camcorder’sremote sensor and press EFF
EN 5The digital video camera converts incoming audio and video signals into digital form for recording.A video signal is composed of a luminance signa
50 ENPLAYBACK Advanced Features (Cont.)Playback MenuThe Playback Menu allows you to set the following functions:Playback Sound (32 kHz, 48 kHz), Sync
EN 51RECORDING SOUND DISPLAY OUTPUT SOUND32 kHz FULL SOUNDSOUND 1 Stereo soundSOUND 248 kHz FULL SOUND Stereo soundSOUND 1 “L” sound is output on both
52 ENPLAYBACK Basic ConnectionsVCR/TV Connection (when connecting directly to the camcorder)Please refer to your VCR and/or TV instruction manual(s)
EN 53VCR/TV Connection (using AC Charger Station)Attach the camcorder to the AC Charger Station, then connect the AC Charger Station to a TV or VCR(Z
54 ENPLAYBACK Basic Connections (Cont.)VCR/TV connection (using the AC Charger Station) (Cont.)Please refer to your VCR and/or TV instruction manual(
EN 55RedWhiteYellow YellowWhiteRedVIDEO/AUDIOcable (provided)VCRCore filterTo S-VIDEO INconnectorTo AUDIO OUTconnectors (L/R)To AUDIO INconnectors (L/
56 ENPLAYBACK Advanced ConnectionsTo DV OUT connectorTo PARALLEL(PRINTER)connectorConnector isunder the cover.To DV IN connectorDV cable (optional)Di
EN 575SUPPLY POWERPlug the AC Charger Station’s power cord intoan AC outlet.6TURN ON POWERTurn the camcorder’s Power Dial to “PLAY”,“A” or “M” while p
58 ENOFFPLAYAM5STWDubbingYou can copy recorded scenes from the camcorder onto a videotape. Refer to your VCR’s instruction manualfor details.NOTES:●Yo
EN 59TWDigital DubbingIt is also possible to copy recorded scenes from the camcorder onto other video unit equipped with a DVconnector. Since a digita
6 ENPROVIDED ACCESSORIESGrip/Hand strapS-VIDEO cableDC cordVIDEO/AUDIO cable(AC Charger Station to TV or VCR,RCA plug 4 RCA plug)AC Charger StationAA-
60 ENTW316789`542VCR CODE LISTVCR BRANDNAME 6 2 6 4 7 7MITSUBISHI 6 7 6 8NEC 3 7
EN 61TWRandom Assemble EditingUsing the remote control, you can use P.AE/Effects and make an original edited tape.1MAKE CONNECTIONSMake sure that the
62 EN4SET EDIT-IN POINTAt the beginning of the scene, press EDIT IN/OUT on the remote control. The Edit-Inposition appears on the Random AssembleEditi
EN 638REGISTER ADDITIONAL SCENESRepeat steps 4 – 7 (Z pg. 62).•To change previously registered points, pressCANCEL on the remote control. Theregistere
64 EN3PLAY BACK DUBBED SCENE•If any images from the scene prior to thetransition you chose for your Edit-In pointwere recorded, that means your VCR mo
EN 657CLOSE MENUPress the Select Dial twice.•Now perform Random Assemble Editingbeginning with step 2 on page 61.NOTES:●Before performing actual Rando
66 ENTWOFFPLAYAM5S6eAudio DubbingThe audio track can be customized only when recorded on the 32 kHz mode (Z pg. 32).NOTES:●Audio Dubbing is not possib
EN 67RECORDING SOUND DISPLAY OUTPUT SOUND32 kHz FULL SOUND Original and new tracks are combined and output in stereo.SOUND 2 New track is output on bo
68 ENSYMPTOM POSSIBLE CAUSES CORRECTIVE ACTION1.No power is supplied.2.“SET DATE/TIME!”appears.3.Recording cannot beperformed.4.There is no playbackpi
EN 69SYMPTOM POSSIBLE CAUSES CORRECTIVE ACTION10.The tape is moving, butthere’s no picture.11.In the 5-Second mode,recording ends before 5seconds have
EN 7TWRemote control unitRM-V712UMiniDV Cassette Tape 30 min(DVM-30) M-DV30MELithium battery CR2025(for remote control unit)Cable adapter
70 ENSYMPTOM POSSIBLE CAUSES CORRECTIVE ACTION18.•The last selected editingscene is ending.•At the end of the lastselected scene for editing,the Power
EN 71SYMPTOM POSSIBLE CAUSES CORRECTIVE ACTION26.•The optional headphones arenot connected to the head-phones connecto.27.•“DISPLAY” is set to “OFF” i
72 ENSYMPTOM POSSIBLE CAUSES CORRECTIVE ACTION32.•During playback of theunrecorded portion, High-speed Search and stillplayback, viewfinderindications
EN 731REMOVE POWER SUPPLYRemove the battery pack or disconnect the ACCharger Station (Z pg. 8 – 10).2CLEAN EXTERIORWipe gently with a soft cloth.•Put
74 ENCONTROLS, INDICATIONS AND CONNECTORS123564#%$8 9 0 ! @7Connector coverPull this out to open.Camcorder1 Stereo microphoneFor use when recording.2
EN 75^*)qwe(&tryuBottom of camcorderw Battery cover open switch (BATTERY)(Z pg. 9)Slide down to open the battery cover.e Function Navigator Dial (
76 ENCONTROLS, INDICATIONS AND CONNECTORS (Cont.)1 DC charger (Z pg. 8)Attach the battery pack to charge.2 Camcorder attachment part (Z pg. 53)Attach
EN 77No. FUNCTION1* Displays the operation mode position. (Z pg. 17)2* Appears when taking a Snapshot. (Z pg. 26)3 Appears when in the Squeeze or Cin
78 EN6eSOUND132kHz LP25 . 12 . 9817 : 30– – – – – – – – – –TC 01 : 28 : 1564BRIGHT1 23465Indications During PlaybackNo. FUNCTION1 Displays the sou
EN 79INDICATIONS FUNCTIONDisplays the battery remaining power.Remaining power level: highRemaining power level: exhaustedAs the battery power comes c
8 ENCharging The Battery PackThe battery pack has not been charged at the factory. Before using it, be sure to charge it with the ACCharger Station.GE
80 ENCAUTIONSCassettesTo properly use and store your cassettes, be sure toread the following cautions:1. During use . . ... make sure the cassette b
EN 81Main Unit1. For safety, DO NOT . . ...open the camcorder’s chassis...disassemble or modify the unit...short-circuit the terminals of the ba
82 ENSPECIFICATIONSCamcorderGeneralPower : DC 6.3 V (using AC Charger Station)DC 7.2 V (using Battery)Power consumption : Approx. 6 WFormat : DV For
EN 83AC Charger StationGeneralPower : AC 110 to 240 V`, 50/60 HzPower consumption : 20 WOutput power : DC 7.2 V, 0.77 A (charge)DC 6.3 V , 1.8 A (VTR)
84 ENGLOSSARY OF TERMSIrisWorks like the pupil of the human eye. In a well-lit environment, the human pupil contracts to keep toomuch light from enter
EN 85INDEXOOn-Screen Menus ... Z pg. 28 – 33, 39, 49, 50Operation Mode ...Z pg. 17PP.AE/Effects...
MEMO
MEMO
GR-DV3COPYRIGHT© 1998 VICTOR COMPANY OF JAPAN, LTD.EKPrinted in Japan0598HOV*UN*VPVICTOR COMPANY OF JAPAN, LIMITED
EN 9Charging EnvironmentPerform charging where the temperature is between 10° and 30°C. 20° to 25°C is the ideal temperature rangefor charging. If the
Produits connexes et manuels pour Caméscopes JVC GR DV 3

 (52 pages)
(56 pages)
(76 pages)
(52 pages)
(52 pages)
(56 pages)
(76 pages)
(52 pages)
 (88 pages)
(52 pages)
(88 pages)
(52 pages)

 (10 pages)
(72 pages)
(10 pages)
(72 pages)
© 2020, manymanuals.fr. Tous droits réservés | 1.633 s |
 Manymanuals.com
 Manymanuals.de
 Manymanuals.fr
 Manymanuals.it
 Manymanuals.pl
 Manymanuals.cz
 Manymanuals.es
 Manymanuals-pt.com
Commentaires sur ces manuels